


How to Build a List Field
As published in the Herald, May 2003, by Sir Arion Hirsch
Materials
 All materials can be purchased at most hardware stores:
- (10) 4öx4" Fence posts cut down to 38" (taller may interfere with combat)
- (20) 4"to5" x 1/4" eye bolts (make sure the loops on the bolts are at least 1" inside diameter)
- 40' 1/2" steel rebar
- Red or yellow spray paint
- Garden hose reel that will hold at least 100' of hose (ours has wheels and a handle for hauling around)
- Min. 300' 1/2" manila rope (3/8" rope will do)
- 100' 1/2" manila rope (3/8" rope will do)
Tools
Instructions
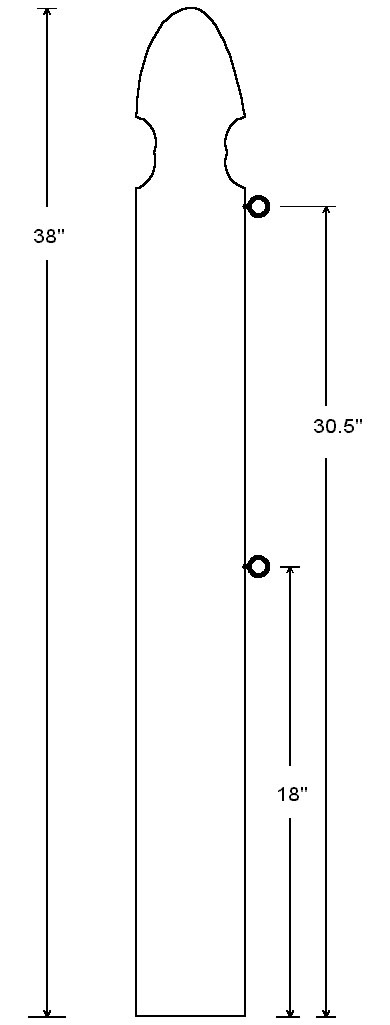 Fence posts come in about 5-foot lengths which need to be cut down to 38". Once they are cut, mark the center of the bottom end and drill at least a 12" deep hole using the 5/8" drill bit straight up the middle of the post. If the wood is still a bit green (damp), and you have the luxury of time, let the posts dry out for a few weeks before drilling. You'll know if the wood is still green if you drill and the refuse is stringy and clumpy rather than coming out as dust. Clear out the hole often while drilling. Do your best to ensure that the hole you are drilling is going straight up the middle (this can be quite difficult). Usually, I have a friend watch from the side to tell me if I'm going in straight while I watch from the top.
Cut the rebar into 2-foot lengths. Grind a point on one end. It doesn't have to be too sharp - just enough to part the dirt as it is pounded in. Round the top of the rebar so that the pounding it takes when being driven into the ground does not cause the top to mushroom (at least right away). After using it awhile, more grinding may be needed as the top of the rebar starts to mushroom.
Mark the rebar 12" from the top and spray paint the top of the rebar red or yellow so it is very visible once pounded into the ground. The paint also gives you a depth to which the rebar will be sunk.
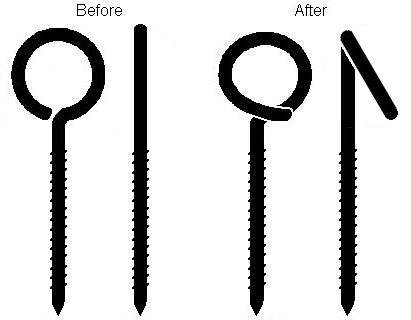 Take an eye bolt and put it in the vise so the loop is sticking out. Bend the end of the loop out to the side and across the bolt so that it makes a ōpig-tailö with a gap just large enough to press the rope through. You want to be able to pop the rope into the loop but have the gap tight enough so that the rope will not pop back out on its own.
Use the 3/16" bit to drill pilot holes for the eyebolts in the post at 18" and 30.5" from the bottom as shown. File any rough edges to avoid wear on the rope.
Before screwing the bolts into the posts, seal or paint the posts. Screw the bolts in all the way and leave the end of the loop pointing down. The rope should be able to be popped down into the loop.
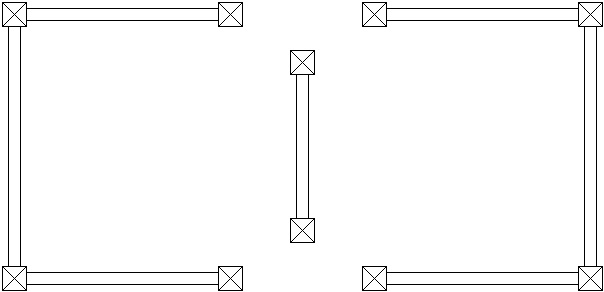
List Field Setup
The 300 feet of rope is enough to make 2 list fields about 20 feet square. We use an extra 100 foot rope for a divider between the fields. This gives us 2 rows of ropes.
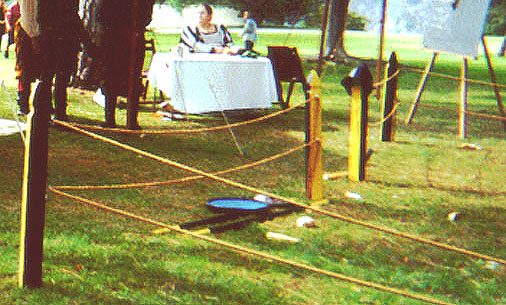
Pound in the rebar up to the start of the paint. The posts at the corners should be angled out slightly (when tension is added by the rope, the post will stand straight up). Then just drop the posts onto the rebar. This is the way we organize our posts for 2 fields.
The 300 foot rope is used for the outside and the 100 foot rope is used for the divider. This setup allows entrances on both sides of the field to both areas. It turns out that it really doesn't matter where you start, just that you keep the rope taught as you go. When I get the entrance, I loop the rope under the bottom of the post and go across the ground to the other post, then back up to a rung and keep going. We usually throw a blanket or fabric over the hose reel to disguise it or run the spool back behind a tent and try not to trip on the rope. The spool allows you to reel in the rope after it has been removed from the posts very quickly. No tangled ropes!
We could also rope off a very large area for a melee tournament if we only use the top hook and run one rope around the field and have used it for encampment fencing as well. One last note, for places that don't allow driving stakes into the ground (like parking lots, inside malls, etc.), platforms can be made for the posts.
’╗┐

The Adrian Empire, Inc. | All Rights Reserved.
All other product names are trademarks of their respective owners.